How to Create Users in Linux Using the useradd Command

John on July 20, 2020
A Linux system is designed to be used by multiple users. As an administrator, you will need to know how to create and remove user accounts and assign them certain privileges.
In this guide, we will be going through using the useradd command, which is how user accounts can be created in Linux.
The useradd Command Syntax
Let's have a look at the useradd command syntax and what options we have available when using it. It is important to note that you will need to be the root user or be able to run commands in sudo mode to use useradd.
useradd [options] LOGIN
The useradd command takes an optional set of options followed by the username. Let's take a look at some of the most common options we have when creating a user.
-m- create a new directory for the user-d- specify a different home directory for the user-g- assign user its primary group-G- assign secondary groups-u- give the user a specific ID-c- add a comment about the user-r- create a "system" account
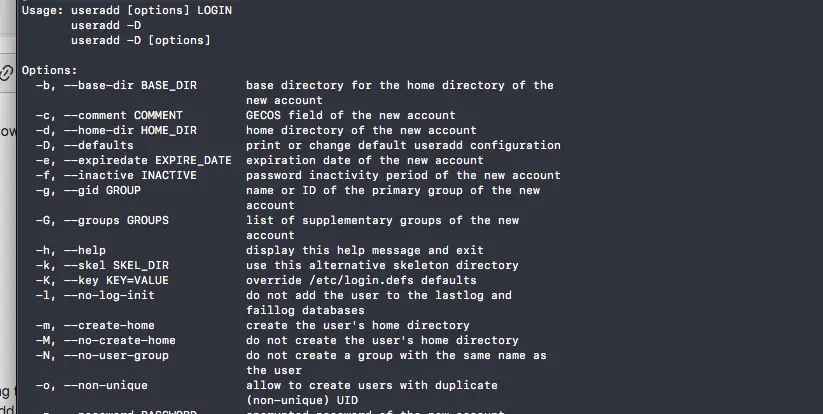
Note - depending on what distribution of Linux you are using the options may have different behaviours. The best thing to do is to print all the options in the command-line by typing useradd on its own.
useradd
How to Create a New Linux User
Run useradd in sudo mode and add the name of the user at the end of the command. With no options supplied the home directory for the account will be what the HOME= setting is in the /etc/default/useradd file. This is usually /home.
sudo useradd amy
Running the above command will add an entry to the /etc/passwd file but the account will be in a locked state. This is because we need to set a password in order to use the account.
We can add a password for the user with the passwd command followed by the name of the user. Once again it will need to run in sudo mode.
sudo passwd amy
You will then be prompted to enter a new password for the account and retype it:
Enter new UNIX password:
Retype new UNIX password:
passwd: password updated successfully
Don't forget to use a strong password.
Create a New User and Create a New Home Directory
You will notice that the result from the previous commands is that we have an active account which can be found in the /etc/passwd file.
amy:x:5001:5001::/home/amy:
But the /home/amy directory wasn't actually created meaning the user will not be able to create edit and delete files in their space.
We can make a new directory for the user when creating it with the useradd command by adding the -m flag to it.
sudo useradd -m amy
Now by running ls in the /home directory we can see the user directory has been automatically created.
ls /home
amy john spamd
How to Create a User with a Different Home Directory in Linux
Sometimes you may want to create a new user with a different home directory to the default one. To do this we will add the -d flag to the useradd command followed by the directory path. We will also need to add the -m flag to create a new directory containing the user data.
sudo useradd -m -d /clients/amy amy
How to Create a User with A Custom ID
Every user in Linux is given a unique numerical ID (UID) upon account creation. "Regular" users will typically be assigned a UID of greater than 5000 and system users below 5000 as defined in /etc/login.defs. The reason for this is there is a difference between what system resources are available to a user based on their UID.
To create a new user with a specific UID we can pass the -u option into the useradd command.
sudo useradd -u 101 amy
To ensure the command has worked correctly you can verify the UID using the id command.
id -u amy
101
Creating a User with a Specific Group ID
Groups in Linux control what a certain set of users can do on the system, whether that be executing, adding or deleting files.
By default, useradd creates a new user with a new group, which is the same as the username of the new user.
You may already have a group setup-up that allows for certain behaviour on your system and would like to add new users to it while creating them. This can be done by adding the -g flag to the useradd command and supplying the name or ID of the group.
sudo useradd -g clients amy
To check that a user has been set to the correct group we can pass-in -gn to the id command.
id -gn amy
clients
Add a New User to Multiple Secondary Groups
A user in Linux must be assigned to one primary group. It can optionally be assigned to multiple secondary groups. We can assign a user to secondary groups with the -G flag followed by a comma-separated list of group names with useradd.
sudo useradd -g amy -G wheel, www-data amy
To see all the groups a user is assigned to, use the id command with no other options.
id amy
uid=5001(amy) gid=5001(amy) groups=5001(amy),27(sudo),33(www-data)
Create a User with an Expiry Date
When using useradd the expiry date for a user is set to 0 meaning the user will never expire. We can set when a user should expire by passing the -e flag into useradd followed by the date it should expire in YYYY-MM-DD format.
sudo useradd -e 2020-07-24 amy
We can verify when the account will expire with the chage command.
chage -l amy
Last password change                    : Jul 17, 2020
Password expires                    : never
Password inactive                   : never
Account expires                     : Jul 24, 2020
Minimum number of days between password change      : 0
Maximum number of days between password change      : 99999
Number of days of warning before password expires   : 7
Create a User with an Expiring Password
To create a user with an expiry date on the password we can pass in the -f flag followed by the number of days before a new password expires.
sudo useradd -f 31 amy
In the above example, we have set new passwords to expire every 31 days. Once again, this can be verified using the chage command.
Create User with a Custom Comment
If you need a future reference about why a user has been created on your system or you simply want to add a comment about it, use the -c flag followed by the text wrapped in "" double quotation marks.
sudo useradd -c "Just another user"
The content of the comment will be displayed alongside other information about the user in the /etc/passwd file.
amy:x:5001:5001:Just another user:/home/amy:
Create a System User in Linux
There isn't a real difference between a “system” user and a “real” apart from the range in which its UID. To create a system user you can pass the -r flag when creating the account with useradd.
sudo useradd -r amy
amy:x:998:998::/home/amy:
Notice how the id differs in comparison to running the useradd command without -r.
Set the Default useradd Values
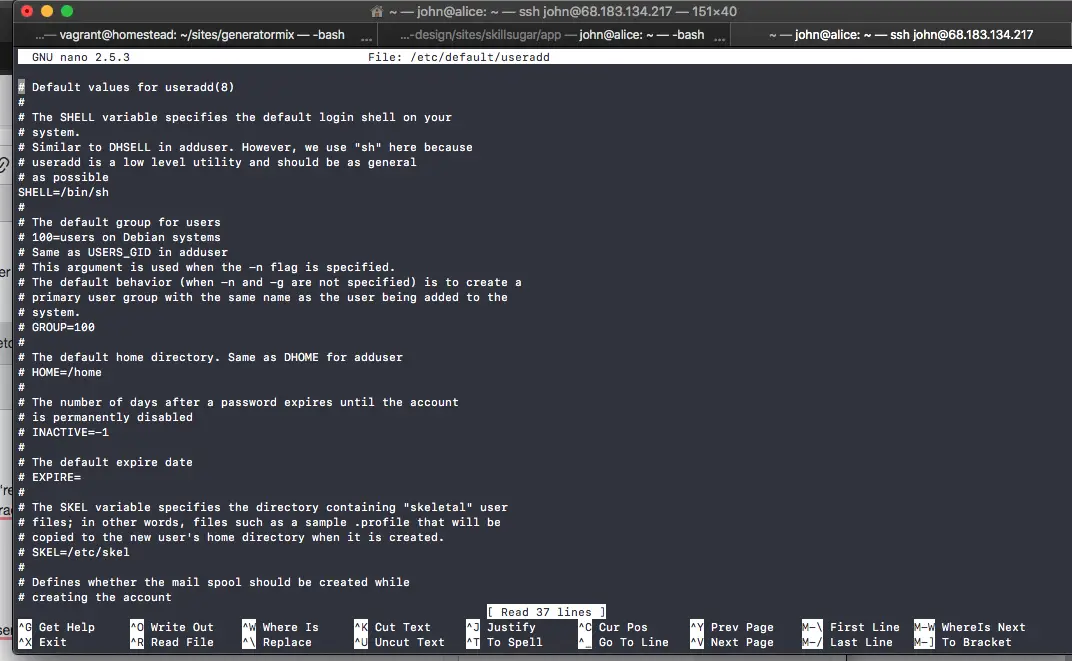
If you find yourself creating a lot of user accounts and the default useradd settings are not what you would like them to be you can modify the /etc/default/useradd file.
We can nano into the /etc/default/useradd file in sudo mode and make any necessary changes. Remember that the setting will not be active if there is a hash at the beginning of the line.
sudo nano /etc/default/useradd
To quickly check what the default settings are we can run the useradd command with the flag -D only.
useradd -D
GROUP=100
HOME=/home
INACTIVE=-1
EXPIRE=
SHELL=/bin/sh
SKEL=/etc/skel
CREATE_MAIL_SPOOL=no
Conclusion
You now know how to create users in Linux and set them up exactly as you wish.