How to Create Custom Artisan Commands in Laravel

John on September 10, 2020
The artisan command interface is a really neat tool for working with the Laravel framework from the command-line. It can be used to create a new Laravel project, seed databases, make controllers, models .etc and basically covers the majority of common tasks you would otherwise need to perform manually while building a web application in Laravel.
What about creating our own custom artisan commands for Laravel? It is super easy to register custom artisan commands to perform almost any conceivable task. In this tutorial, we will create an artisan command that will loop through all posts and update them.
Useful Artisan Commands
There are too many artisan commands to list here but let's look at some of the most useful ones before making our own custom one.
make:controller– Create a new controller classmake:job– Create a new job classmake:model– Create a new Eloquent model classmake:provider– Create a new service provider classmake:rule– Create a new validation rulemake:seeder– Create a new seeder classmake:migration– Create a new migration file
Register the Command
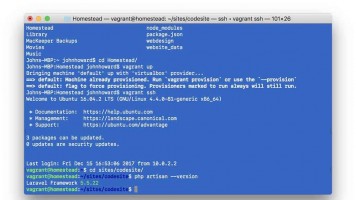
The first step is to register the command using the artisan make:command command. log in to your server VIA the terminal and cd to your Laravel projects root folder.
cd sites/skillsugar
Now we can register a new command. The last part of the command is the name of the command you would like to register. The one I made is called cacheAllItems because I needed to re-cache all the posts on my app VIA the command-line.
php artisan make:command cacheAllItems
Console command created successfully.
The above command will create a new class called cacheAllItems in your app/Console/Commands directory.
<?php

namespace App\Console\Commands;

use Illuminate\Console\Command;

class cacheAllItems extends Command
{
   /**
    * The name and signature of the console command.
    *
    * @var string
    */
   protected $signature = 'command:name';

   /**
    * The console command description.
    *
    * @var string
    */
   protected $description = 'Command description';

   /**
    * Create a new command instance.
    *
    * @return void
    */
   public function __construct()
   {
       parent::__construct();
   }

   /**
    * Execute the console command.
    *
    * @return mixed
    */
   public function handle()
   {
       //
   }
}
The next step is to change the protected $signature to the name of your command and protected $description value a relevant description of what your command will do.
protected $signature = 'cacheallitems';
protected $description = 'Creates a new cache for all the posts.';
Write the Body of the Command
The next step is to write the body of the command. The code that will be run when you execute the console command lives inside the handle() function at the bottom of the command class.
   public function handle()
   {
       //
   }
For my function, I needed to get all the live posts and loop through them and create a new cache for each of them. This is what my function looks like:
   public function handle()
   {
       $items = Item::where('status', 1)->get();

       foreach ($items as $key => $item) {

           $this->info('Updated post: '. $item->id);

           $this->itemService->updateItemCacheBySlug($item->url);
       }
       return 0;
   }
As you can see I am looping through the posts, providing a status message back to the console on each iteration using $this->info(); and finally returning 0 to finish the program.
For reference, this is the whole cacheAllItems class I am using:
<?php

namespace App\Console\Commands;

use Illuminate\Console\Command;
use App\ServiceLogic\ItemService;
use App\Item;

class cacheAllItems extends Command
{
   /**
    * The name and signature of the console command.
    *
    * @var string
    */
   protected $signature = 'cacheallitems';

   /**
    * The console command description.
    *
    * @var string
    */
   protected $description = 'Creates a new cache for all the posts.';

   /**
    * Create a new command instance.
    *
    * @return void
    */
   public function __construct()
   {
       parent::__construct();

       $this->itemService = new ItemService();
   }

   /**
    * Execute the console command.
    *
    * @return mixed
    */
   public function handle()
   {
       $items = Item::where('status', 1)->get();

       foreach ($items as $key => $item) {

           $this->info('Updated post: '. $item->id);

           $this->itemService->updateItemCacheBySlug($item->url);
       }
       return 0;
   }
}
Register the Command in The Kernel
The final step is to register the command in the app/Console/Kernel.php file. Add the following line (replacing cacheAllItems with the name of your command class) inside the protected $commands array.
Commands\cacheAllItems::class,
It should look like this:
protected $commands = [
  Commands\cacheAllItems::class,
];
Test the Command
That is it! Now, all we have to do is run the command from the console and if there are no errors it will run the task. To run the command type artisan followed by the name of the command.
artisan cacheallitems
#...
Updated post: 85
Updated post: 86
Updated post: 87
Updated post: 88
Updated post: 89
Updated post: 90
Updated post: 91
Updated post: 92
Updated post: 93
Conclusion
You now know how to create new commands for the artisan command-line interface. Not only can you run these commands yourself from the command-line but you can also make them run on a schedule using cron.