Encrypt Mac Hard Drive Using FileVault 2 to Secure Data

John on May 16, 2020
Encrypting your data is a straightforward task on MacOs and will allow you to keep your files safe from unauthorised access. The best way to encrypt your Mac hard drive is with FileVault 2 which uses XTS-AES-128 and a 256-bit key keeping your data safe.
How to Set up FileVault 2 on Your Mac
You will have to make sure that your system is running OS X Lion or later. If you are running an older version of MacOs then you should definitely upgrade it now to the Latest High Sierra system as running out-dated builds will no doubt have security holes themselves.
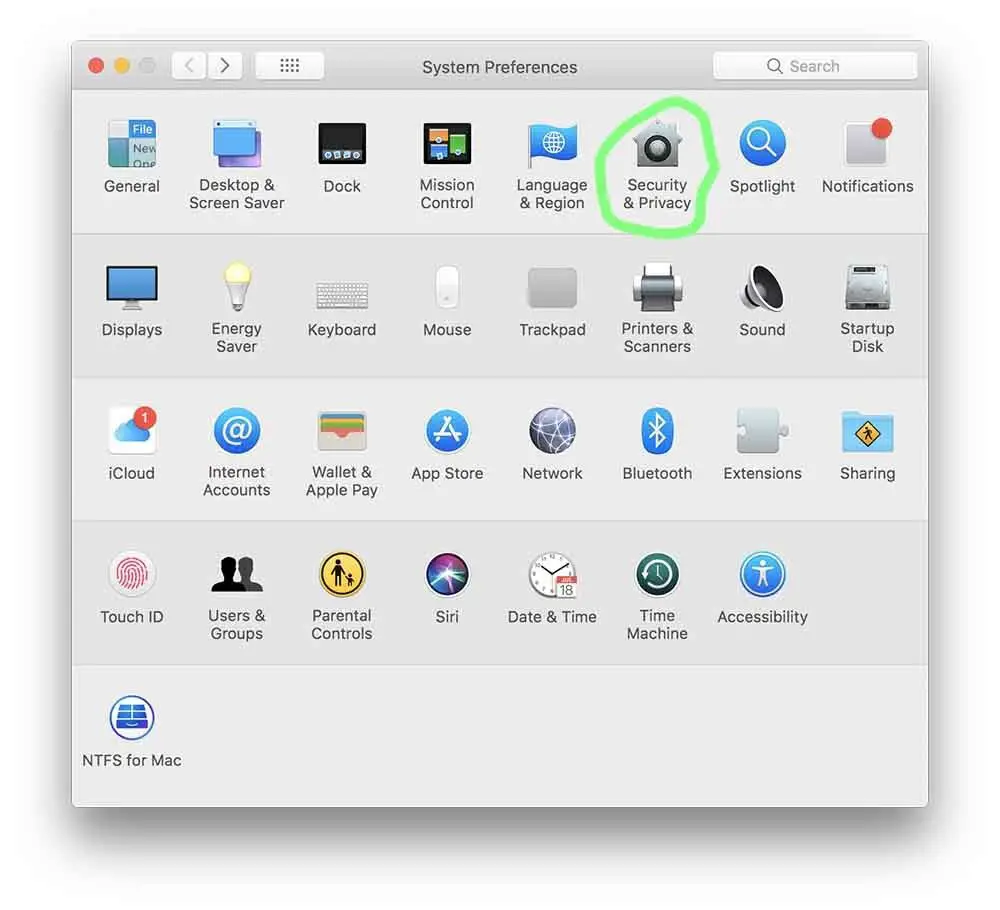
- Open System Preferences by pressing cmd + spacebar and typing in "System Preferences" and choosing the first result
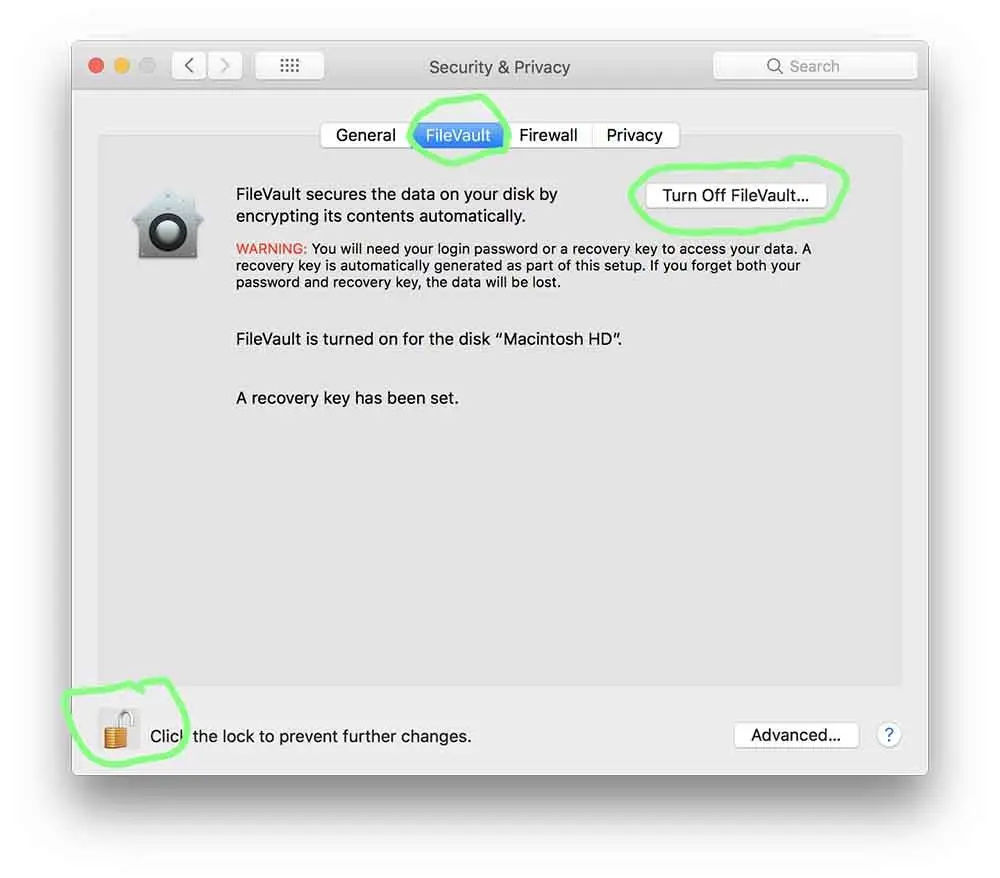
- Within System Preferences find the "Security & Privacy" section
- Then click on FileVault Tab
- Click the lock symbol on the bottom left of the window and enter your admin password when prompted
- Click "Turn on FileVault"
If there are other user accounts on your Mac you will be given the option to enable each user on the encrypted drive. If you don't they will not be able to log in once you start the encryption process, to enable click "enable user" and type in the account password when prompted. New accounts created after FileVault has been enabled will work straight away.
The option to allow iCloud to access the drive will also be presented if you have it set up. It would be a good idea to allow this because if you forget your password you have no chance of getting to your data.
Once you have enabled FileVault it will take a while to completely encrypt the drive in the background meaning you can continue to use your machine as normal. You have to have your Macbook plugin into the power supply for the process to initiate; you can monitor the progress under the FileVault tab.
The next time you reset your Mac you will need to enter your password as no automatic logins are allowed with an encrypted drive.